Step 1 of 7
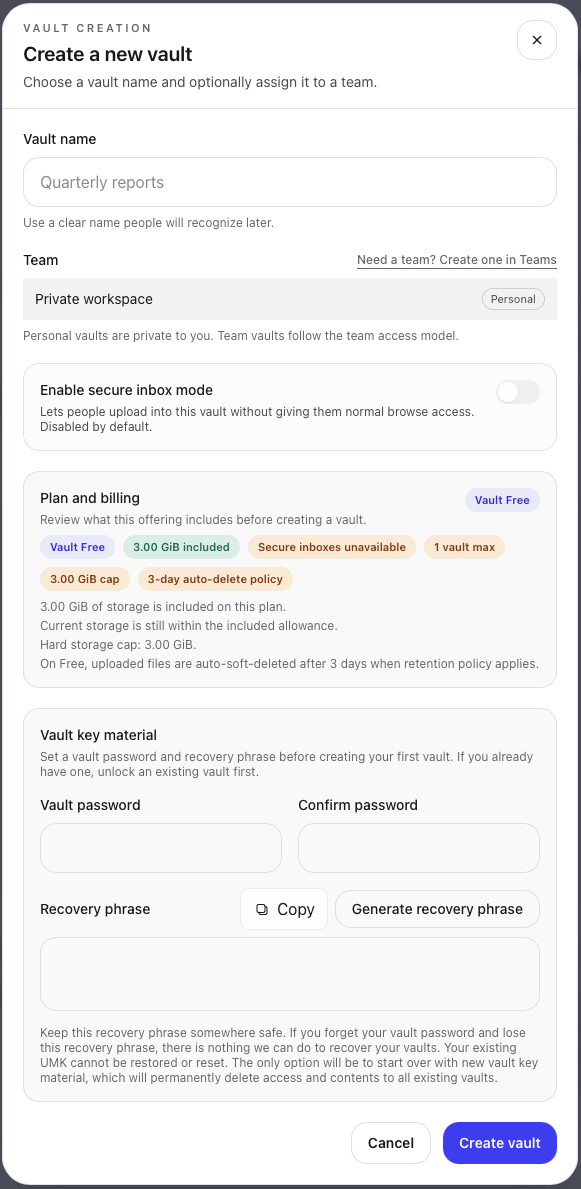
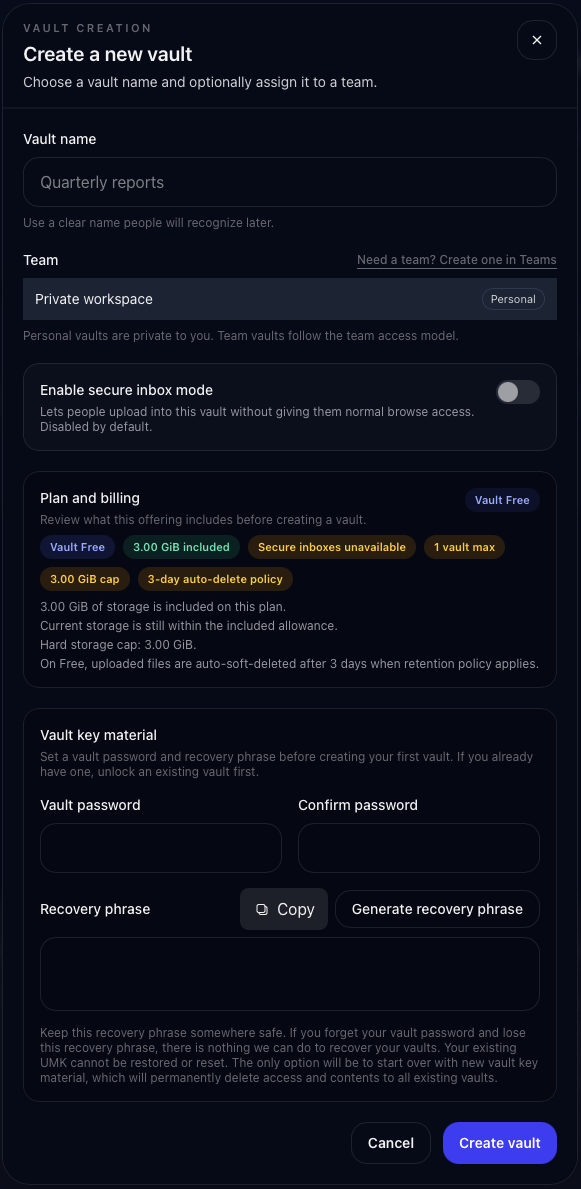
Create and unlock your first vault
Create and unlock your first vault
A vault is a secure workspace for files you want to keep. You can create separate vaults for clients, projects, teams, or sensitivity levels.
Steps
- 1. Open Vault. Use the Vault button from the site or dashboard. If you are not signed in, sign in first.
- 2. Choose New Vault. Pick a clear name such as a client name, project name, or department.
- 3. Decide whether it is personal or team-based. Personal vaults are private to you. Team vaults are for shared work.
- 4. Create the vault. Vault prepares the encryption material needed to protect files before upload.
- 5. Unlock when prompted. Unlocking lets your browser work with your encrypted files during the current session.
What unlocking means
Unlocking does not make your files public. It means your current browser session has the keys it needs to encrypt, decrypt, upload, and download your Vault files. Lock or sign out when you are done on a shared computer.
Continue the guide