What senders can do
- Open the upload link
- Read your instructions
- Add files and sender notes
- Submit files into the inbox
Step 4 of 7
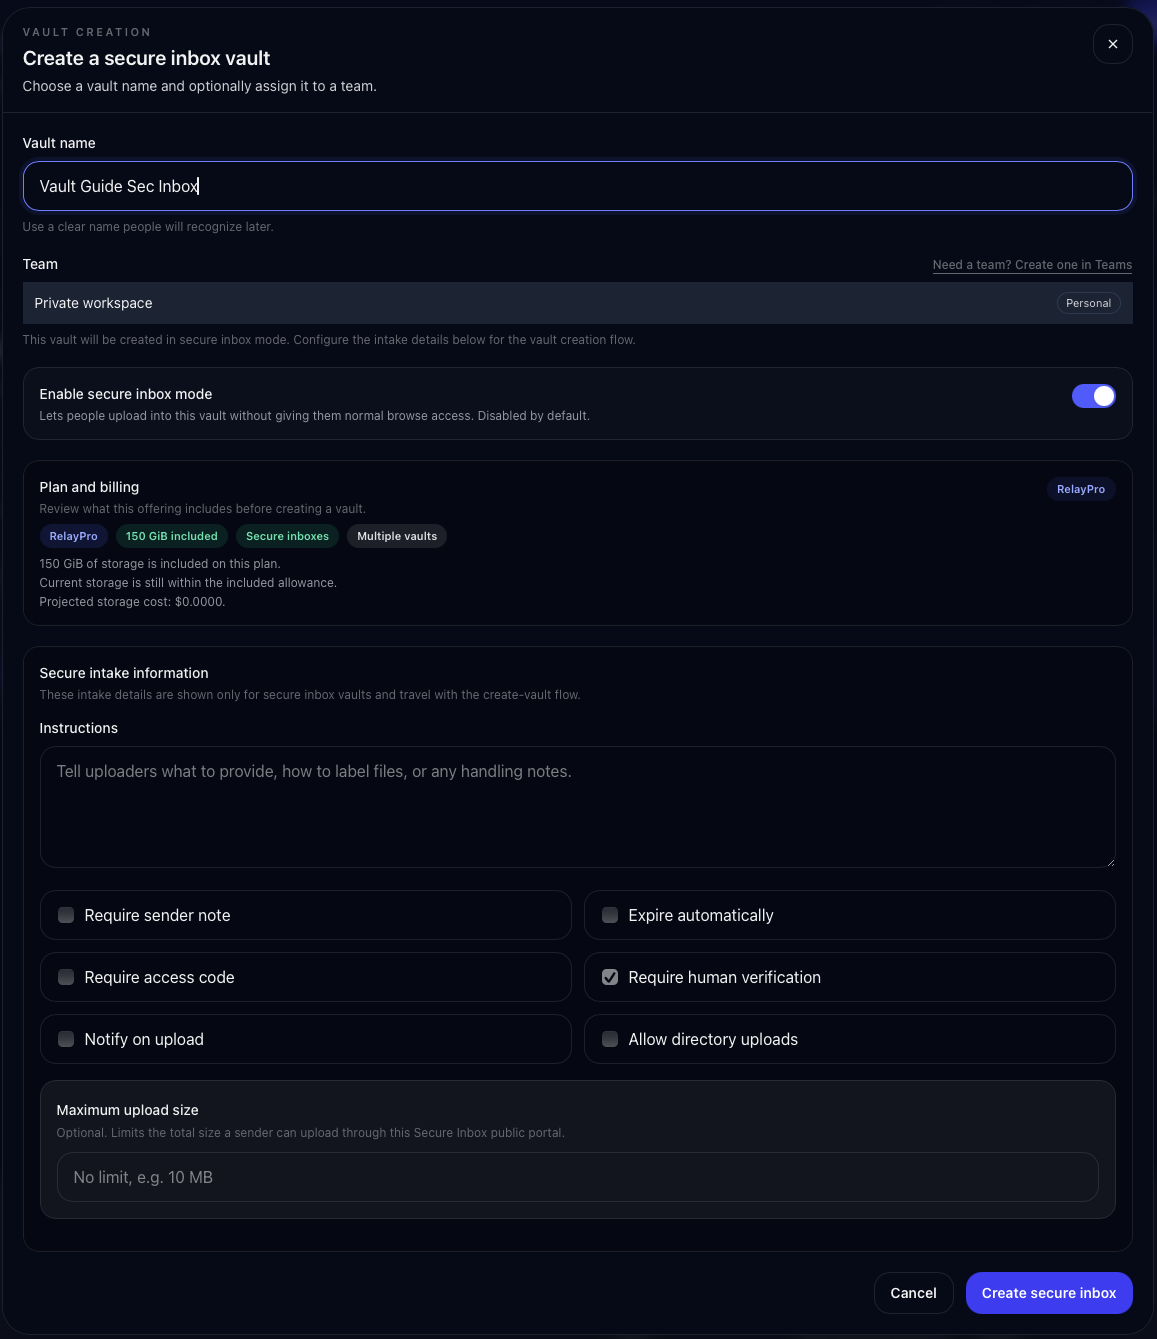
Collect files with Secure Inbox
Secure Inbox is for receiving files from outside people. They get a focused upload page, not access to browse your existing Vault contents.
If you publish a secure inbox link on a website, social profile, or other public place, strongly consider requiring an access code. The link gets people to the upload page; the access code adds another gate before upload.
Continue the guide